Dapper Getting Started With Querying Data
Dapper provides the Query extension method that enables you to retrieve data from the database and populate data in your object model.
The model is a collection of classes to interact with the database. Now let's add an entity class Customer in the Model folder.
public class Customer
{
    public int CustomerID { get; set; }
    public string FirstName { get; set; }
    public string LastName { get; set; }
    public string Email { get; set; }
}
MVC controllers are responsible for responding to requests made against an ASP.NET MVC website. Let's create a 'CustomerController' by right-clicking on the Controller folder in Solution Explorer.

Select Add > Controller... option.
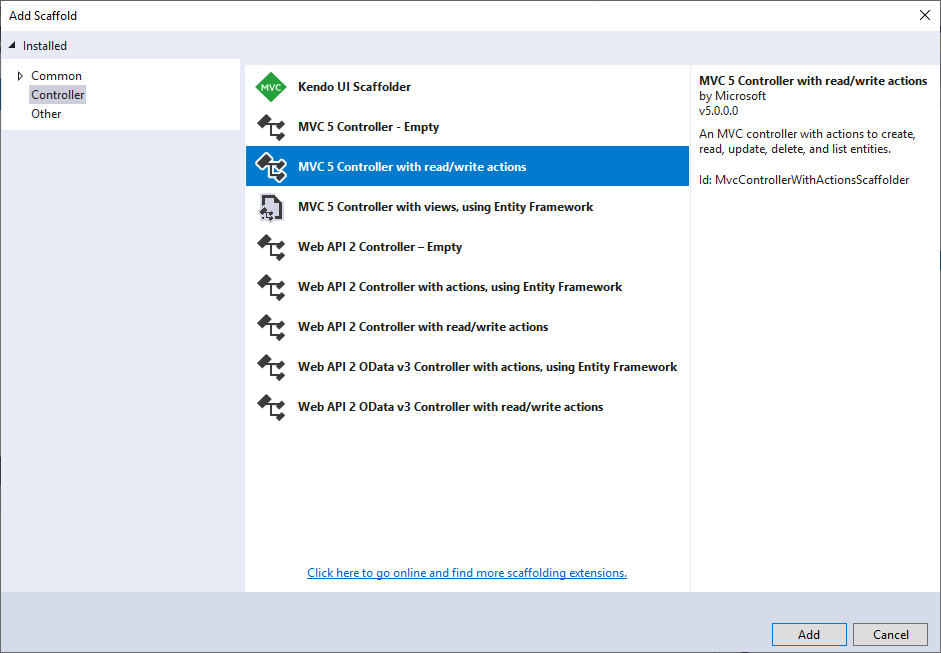
On Add Scaffold dialog, choose MVC 5 Controller with read/write actions, click on Add button, and call it CustomerController.
In the Controller Index Action, let's add the following code to retrieve all the data from the Customers table.
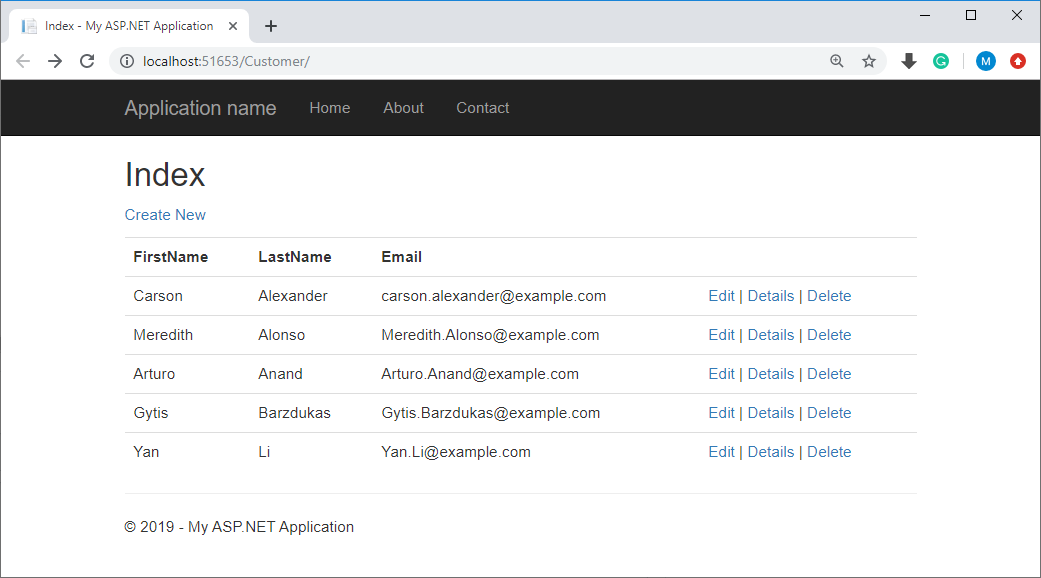
// GET: Customer
public ActionResult Index()
{
    List<Customer> customers = new List<Customer>();
    using (IDbConnection db = new SqlConnection(ConfigurationManager.ConnectionStrings["CustomerConnection"].ConnectionString))
    {

        customers = db.Query<Customer>("Select * From Customers").ToList();
    }
    return View(customers);
}
The above code retrieves with the Dapper Query method all the records from the Customers table, stores them in memory, and returns the collection.
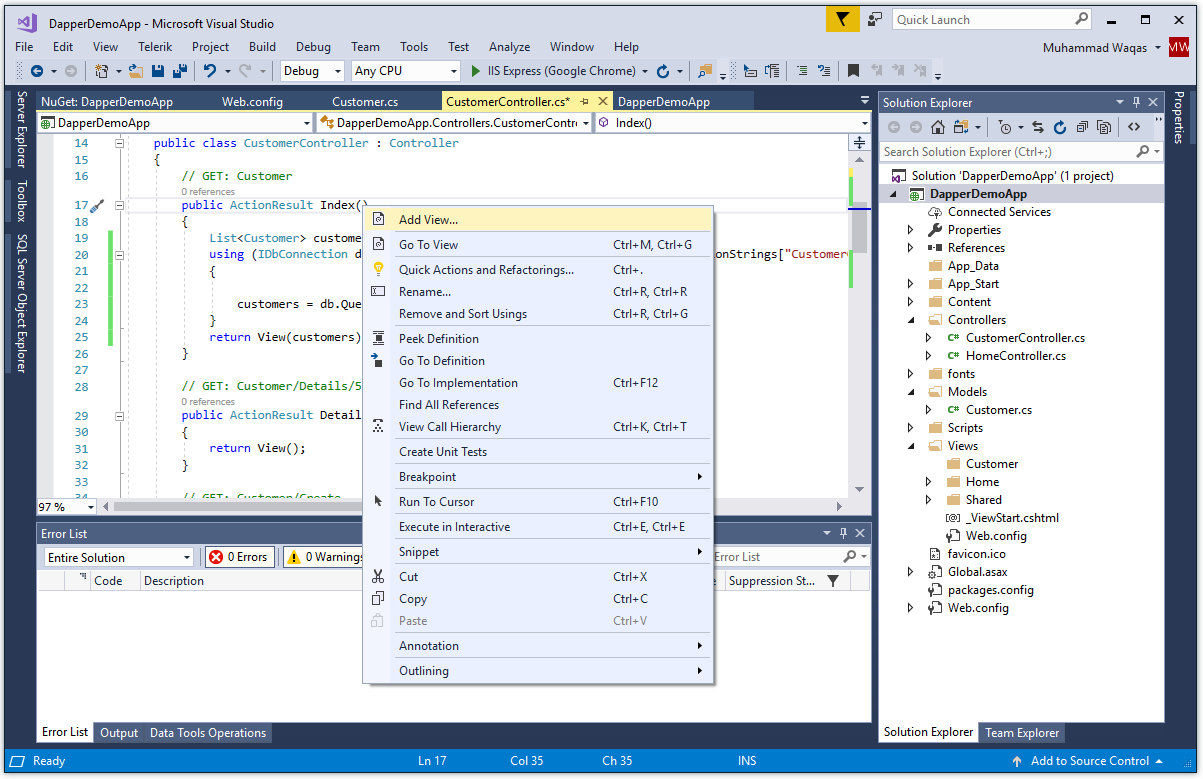
Generally, we create View with the same name as an Action method, so let's create an Index view by right-clicking on the Index Action method in CustomerController and select the Add View.
On Add Scaffold dialog, choose MVC 5 View and click on the Add button.
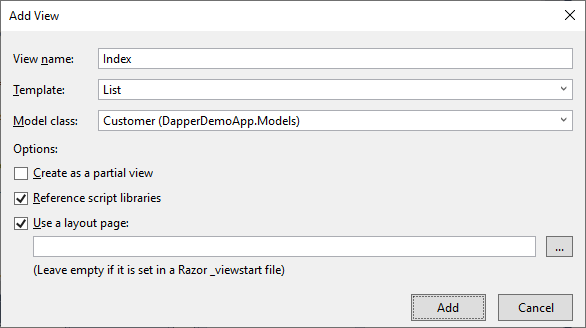
- On the Add View dialog, the View name will appear by default.
- Select the template from the Template dropdown list for which you want to create a view, e.g. List.
- Choose your model class, e.g.
Customer
Click the Add button and it will add the following code for you.
@model IEnumerable<DapperDemoApp.Models.Customer>

@{
    ViewBag.Title = "Index";
}

<h2>Index</h2>

<p>
    @Html.ActionLink("Create New", "Create")
</p>
<table class="table">
    <tr>
        <th>
            @Html.DisplayNameFor(model => model.FirstName)
        </th>
        <th>
            @Html.DisplayNameFor(model => model.LastName)
        </th>
        <th>
            @Html.DisplayNameFor(model => model.Email)
        </th>
        <th></th>
    </tr>

@foreach (var item in Model) {
    <tr>
        <td>
            @Html.DisplayFor(modelItem => item.FirstName)
        </td>
        <td>
            @Html.DisplayFor(modelItem => item.LastName)
        </td>
        <td>
            @Html.DisplayFor(modelItem => item.Email)
        </td>
        <td>
            @Html.ActionLink("Edit", "Edit", new { id=item.CustomerID }) |
            @Html.ActionLink("Details", "Details", new { id=item.CustomerID }) |
            @Html.ActionLink("Delete", "Delete", new { id=item.CustomerID })
        </td>
    </tr>
}

</table>
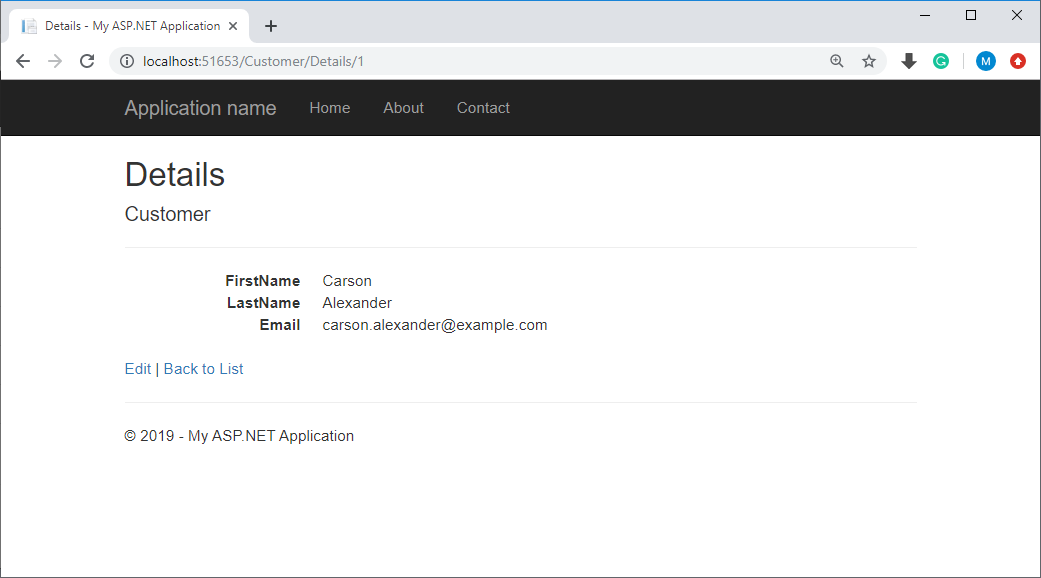
Similarly, you can add the following code in the Details action method to retrieve with the Dapper Query method specific customer from the Customers table by passing an Anonymous Type Parameter.
// GET: Customer/Details/5
public ActionResult Details(int id)
{
    Customer customer = new Customer();
    using (IDbConnection db = new SqlConnection(ConfigurationManager.ConnectionStrings["CustomerConnection"].ConnectionString))
    {
        customer = db.Query<Customer>("Select * From Customers WHERE CustomerID =" + id, new { id }).SingleOrDefault();
    }
    return View(customer);
}
Again, we will create a Detail view by right-clicking on the Details action method in CustomerController and select Add View. On Add Scaffold dialog, choose MVC 5 View and click on the Add button.
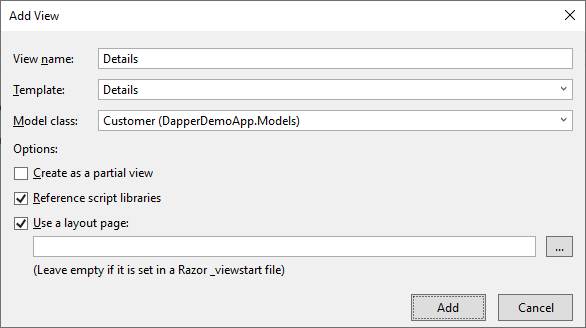
- On the Add View dialog, the View name will appear by default.
- Select the template from the Template dropdown list for which you want to create a view, e.g.
Details. - Choose your model class, e.g.
Customer
Click the Add button and it will add the following code for you.
@model DapperDemoApp.Models.Customer

@{
   ViewBag.Title = "Details";
}

<h2>Details</h2>

<div>
   <h4>Customer</h4>
   <hr />
   <dl class="dl-horizontal">
       <dt>
           @Html.DisplayNameFor(model => model.FirstName)
       </dt>

       <dd>
           @Html.DisplayFor(model => model.FirstName)
       </dd>

       <dt>
           @Html.DisplayNameFor(model => model.LastName)
       </dt>

       <dd>
           @Html.DisplayFor(model => model.LastName)
       </dd>

       <dt>
           @Html.DisplayNameFor(model => model.Email)
       </dt>

       <dd>
           @Html.DisplayFor(model => model.Email)
       </dd>

   </dl>
</div>
<p>
   @Html.ActionLink("Edit", "Edit", new { id = Model.CustomerID }) |
   @Html.ActionLink("Back to List", "Index")
</p>
Let's run your application and you will see all the customers.
Now click on the Details link of any customer and you will see all the details for that customer.
ZZZ Projects