Dapper Getting Started With a Step-by-Step Tutorial
What is Dapper?
Dapper is an object-relational mapping (ORM) for the .NET platform. It provides a framework for mapping an object-oriented domain model to a traditional relational database.
- Dapper provides a mapping between databases and .NET objects.
- It owns the title of King of Micro ORM in terms of speed and is as fast as using a raw ADO.NET data reader.
- It extends the
IDbConnectionby providing useful extension methods to query your database. - Dapper also supports mapping queries to objects with multiple levels of nesting (e.g. results that contain lists of objects).
Features
Dapper has the following key features:
- Speedy and high performance
- Choice of static/dynamic object binding
- Easy handling of SQL query
- Multiple query support
- Support and easy handling of stored procedures
- Operating directly on the
IDbConnectioninterface - Bulk data insert functionality
How to Install Dapper?
To install Dapper using Visual Studio, you can follow these steps:
Step 1
Create an ASP.NET MVC Web Application project.
Step 2
Install Dapper through NuGet by executing the following command in Package Manager Console.
PM> Install-Package Dapper
You can also see our Dapper Downloads section for more options / libraries.
Database Data
For this example, let's assume we have the following Customers table in the database.
CREATE TABLE [dbo].[Customers] (
    [CustomerID] INT            IDENTITY (1, 1) NOT NULL,
    [FirstName]  NVARCHAR (MAX) NULL,
    [LastName]   NVARCHAR (MAX) NULL,
    [Email]      NVARCHAR (MAX) NULL,
    CONSTRAINT [PK_dbo.Customers] PRIMARY KEY CLUSTERED ([CustomerID] ASC)
);
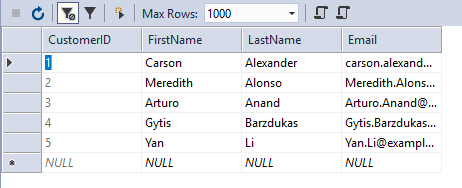
The customers' table contains the following data.
Create Model
The model is a collection of classes to interact with the database. Now let's add an entity class Customer in the Model folder.
public class Customer
{
    public int CustomerID { get; set; }
    public string FirstName { get; set; }
    public string LastName { get; set; }
    public string Email { get; set; }
}
Create Controller
MVC controllers are responsible for responding to requests made against an ASP.NET MVC website. Let's create a 'CustomerController' with MVC 5 Controller with read/write actions.
In the Controller Index Action, let's add the following code to retrieve all the data from the Customers table.
// GET: Customer
public ActionResult Index()
{
    List<Customer> customers = new List<Customer>();
    using (IDbConnection db = new SqlConnection(ConfigurationManager.ConnectionStrings["CustomerConnection"].ConnectionString))
    {

        customers = db.Query<Customer>("Select * From Customers").ToList();
    }
    return View(customers);
}
Create View
Generally, we create a View with the same name as an Action method, so let's create an Index view and add the following code.
@model IEnumerable<DapperDemo.Models.Customer>

@{
    ViewBag.Title = "Index";
}

<h2>Index</h2>

<p>
    @Html.ActionLink("Create New", "Create")
</p>
<table class="table">
    <tr>
        <th>
            @Html.DisplayNameFor(model => model.FirstName)
        </th>
        <th>
            @Html.DisplayNameFor(model => model.LastName)
        </th>
        <th>
            @Html.DisplayNameFor(model => model.Email)
        </th>
        <th></th>
    </tr>

@foreach (var item in Model) {
    <tr>
        <td>
            @Html.DisplayFor(modelItem => item.FirstName)
        </td>
        <td>
            @Html.DisplayFor(modelItem => item.LastName)
        </td>
        <td>
            @Html.DisplayFor(modelItem => item.Email)
        </td>
        <td>
            @Html.ActionLink("Edit", "Edit", new { id=item.CustomerID }) |
            @Html.ActionLink("Details", "Details", new { id=item.CustomerID }) |
            @Html.ActionLink("Delete", "Delete", new { id=item.CustomerID })
        </td>
    </tr>
}

</table>
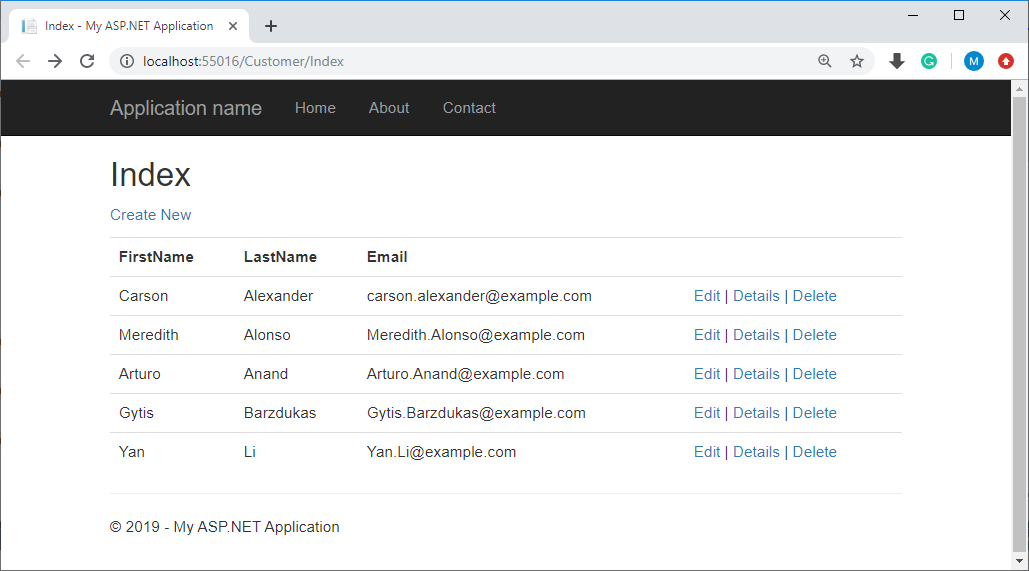
Let's run your application and specify the following URL.
http://localhost:55016/Customer/
ZZZ Projects