Dapper Getting Started With Inserting and Updating Data
When working with databases, you will often need to insert and update records. When it comes to writing insert or update statements in Dapper, the simple and easy way is to use the Execute method, which allows you to execute a raw SQL statement.
The Execute extension method in Dapper enables you to execute a command one or multiple times and return the number of affected rows.
This method is usually used to execute:
Insert
Inserting in Dapper a single new record is easy. All we need to do is write an INSERT statement with parameters for each column that we want to set. To insert data into the database, the CustomerController contains two Create action methods.
- The first method is for the
GETprocess which will run when we call the method. - The second method is for the
POSTprocess which will run when we submit the entry to the server.
In Controller Create action for POST, let's add the following code to insert new customer records to the Customers table.
// GET: Customer/Create
public ActionResult Create()
{
    return View();
}

// POST: Customer/Create
[HttpPost]
public ActionResult Create(Customer customer)
{
    try
    {
        using (IDbConnection db = new SqlConnection(ConfigurationManager.ConnectionStrings["CustomerConnection"].ConnectionString))
        {
            string sqlQuery = "Insert Into Customers (FirstName, LastName, Email) Values(@FirstName, @LastName, @Email)";

            int rowsAffected = db.Execute(sqlQuery, customer);
        }

        return RedirectToAction("Index");
    }
    catch
    {
        return View();
    }
}
Let's create a view by right-clicking on the Create action method in CustomerController and selecting the Add View. On the Add Scaffold dialog, choose MVC 5 View and click on the Add button.
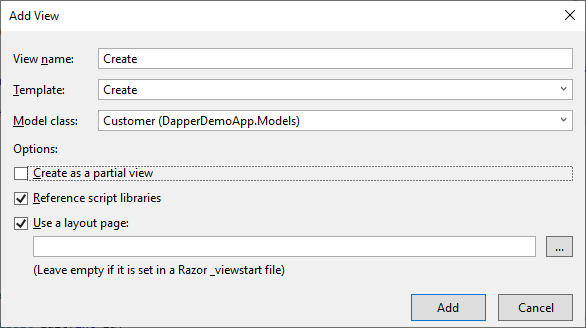
- On the Add View dialog, the View name will appear by default.
- Select the template from the Template dropdown list for which you want to create a view, e.g.
Create. - Choose your model class, e.g.
Customer
Click the Add button and it will add the following code for you.
@model DapperDemoApp.Models.Customer

@{
    ViewBag.Title = "Create";
}

<h2>Create</h2>


@using (Html.BeginForm())
{
    @Html.AntiForgeryToken()

    <div class="form-horizontal">
        <h4>Customer</h4>
        <hr />
        @Html.ValidationSummary(true, "", new { @class = "text-danger" })
        <div class="form-group">
            @Html.LabelFor(model => model.FirstName, htmlAttributes: new { @class = "control-label col-md-2" })
            <div class="col-md-10">
                @Html.EditorFor(model => model.FirstName, new { htmlAttributes = new { @class = "form-control" } })
                @Html.ValidationMessageFor(model => model.FirstName, "", new { @class = "text-danger" })
            </div>
        </div>

        <div class="form-group">
            @Html.LabelFor(model => model.LastName, htmlAttributes: new { @class = "control-label col-md-2" })
            <div class="col-md-10">
                @Html.EditorFor(model => model.LastName, new { htmlAttributes = new { @class = "form-control" } })
                @Html.ValidationMessageFor(model => model.LastName, "", new { @class = "text-danger" })
            </div>
        </div>

        <div class="form-group">
            @Html.LabelFor(model => model.Email, htmlAttributes: new { @class = "control-label col-md-2" })
            <div class="col-md-10">
                @Html.EditorFor(model => model.Email, new { htmlAttributes = new { @class = "form-control" } })
                @Html.ValidationMessageFor(model => model.Email, "", new { @class = "text-danger" })
            </div>
        </div>

        <div class="form-group">
            <div class="col-md-offset-2 col-md-10">
                <input type="submit" value="Create" class="btn btn-default" />
            </div>
        </div>
    </div>
}

<div>
    @Html.ActionLink("Back to List", "Index")
</div>

@section Scripts {
    @Scripts.Render("~/bundles/jqueryval")
}
Update
Updating in Dapper an existing entity is similar to inserting. All we need is a SQL statement containing an UPDATE statement that sets the appropriate columns. We also want to make sure we include a WHERE clause limiting the update only to the row with the specified Id.
To update data in the database, the CustomerController contains two Edit action methods.
- The first method for the
GETprocess which will run when we call the method. - The second method for the
POSTprocess will run when we submit the entry to the server.
In Controller Edit actions, let's add the following code to update the existing customer record into the Customers table.
// GET: Customer/Edit/5
public ActionResult Edit(int id)
{
    Customer customer = new Customer();
    using (IDbConnection db = new SqlConnection(ConfigurationManager.ConnectionStrings["CustomerConnection"].ConnectionString))
    {
        customer = db.Query<Customer>("Select * From Customers WHERE CustomerID =" + id, new { id }).SingleOrDefault();
    }
    return View(customer);
}

// POST: Customer/Edit/5
[HttpPost]
public ActionResult Edit(int id, Customer customer)
{
    try
    {
        using (IDbConnection db = new SqlConnection(ConfigurationManager.ConnectionStrings["CustomerConnection"].ConnectionString))
        {
            string sqlQuery = "UPDATE Customers set FirstName='" + customer.FirstName +
                "',LastName='" + customer.LastName +
                "',Email='" + customer.Email +
                "' WHERE CustomerID=" + customer.CustomerID;

            int rowsAffected = db.Execute(sqlQuery);
        }

        return RedirectToAction("Index");
    }
    catch
    {
        return View();
    }
}
Let's create a view by right-clicking on the Edit action method in CustomerController and select Add View. On Add Scaffold dialog, choose MVC 5 View and click on the Add button.
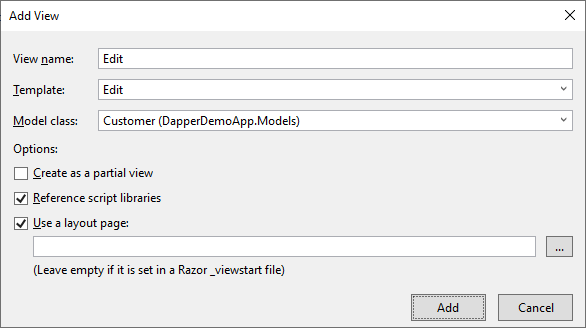
- On the Add View dialog, the View name will appear by default.
- Select the template from the Template dropdown list for which you want to create a view, e.g.
Edit. - Choose your model class, e.g.
Customer
Click the Add button and it will add the following code for you.
@model DapperDemoApp.Models.Customer

@{
    ViewBag.Title = "Edit";
}

<h2>Edit</h2>


@using (Html.BeginForm())
{
    @Html.AntiForgeryToken()

    <div class="form-horizontal">
        <h4>Customer</h4>
        <hr />
        @Html.ValidationSummary(true, "", new { @class = "text-danger" })
        @Html.HiddenFor(model => model.CustomerID)

        <div class="form-group">
            @Html.LabelFor(model => model.FirstName, htmlAttributes: new { @class = "control-label col-md-2" })
            <div class="col-md-10">
                @Html.EditorFor(model => model.FirstName, new { htmlAttributes = new { @class = "form-control" } })
                @Html.ValidationMessageFor(model => model.FirstName, "", new { @class = "text-danger" })
            </div>
        </div>

        <div class="form-group">
            @Html.LabelFor(model => model.LastName, htmlAttributes: new { @class = "control-label col-md-2" })
            <div class="col-md-10">
                @Html.EditorFor(model => model.LastName, new { htmlAttributes = new { @class = "form-control" } })
                @Html.ValidationMessageFor(model => model.LastName, "", new { @class = "text-danger" })
            </div>
        </div>

        <div class="form-group">
            @Html.LabelFor(model => model.Email, htmlAttributes: new { @class = "control-label col-md-2" })
            <div class="col-md-10">
                @Html.EditorFor(model => model.Email, new { htmlAttributes = new { @class = "form-control" } })
                @Html.ValidationMessageFor(model => model.Email, "", new { @class = "text-danger" })
            </div>
        </div>

        <div class="form-group">
            <div class="col-md-offset-2 col-md-10">
                <input type="submit" value="Save" class="btn btn-default" />
            </div>
        </div>
    </div>
}

<div>
    @Html.ActionLink("Back to List", "Index")
</div>

@section Scripts {
    @Scripts.Render("~/bundles/jqueryval")
}
Delete
Deleting in Dapper an entity is the easiest of all because it only requires a unique Id to identify the entity being deleted. The SQL statement is a simple DELETE with a WHERE clause on the Id column.
To delete a record from the database, the CustomerController contains two Delete action methods.
- The first method is for the
GETprocess which will run when we call the method. - The second method is for the
POSTprocess which will run when we submit the delete request to the server.
In Controller Delete actions, let's add the following code to delete the existing customer record from the Customers table.
// GET: Customer/Delete/5
public ActionResult Delete(int id)
{
    Customer customer = new Customer();
    using (IDbConnection db = new SqlConnection(ConfigurationManager.ConnectionStrings["CustomerConnection"].ConnectionString))
    {
        customer = db.Query<Customer>("Select * From Customers WHERE CustomerID =" + id, new { id }).SingleOrDefault();
    }
    return View(customer);
}

// POST: Customer/Delete/5
[HttpPost]
public ActionResult Delete(int id, FormCollection collection)
{
    try
    {
        using (IDbConnection db = new SqlConnection(ConfigurationManager.ConnectionStrings["CustomerConnection"].ConnectionString))
        {
            string sqlQuery = "Delete From Customers WHERE CustomerID = " + id;

            int rowsAffected = db.Execute(sqlQuery);
        }

        return RedirectToAction("Index");
    }
    catch
    {
        return View();
    }
}
Let's create a view by right-clicking on the Delete action method in CustomerController and select Add View. On Add Scaffold dialog, choose MVC 5 View and click on the Add button.
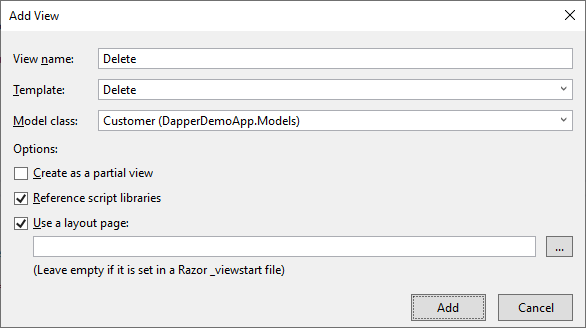
- On the Add View dialog, the View name will appear by default.
- Select the template from the Template dropdown list for which you want to create a view, e.g.
Delete. - Choose your model class, e.g.
Customer
Click the Add button and it will add the following code for you.
@model DapperDemoApp.Models.Customer

@{
    ViewBag.Title = "Delete";
}

<h2>Delete</h2>

<h3>Are you sure you want to delete this?</h3>
<div>
    <h4>Customer</h4>
    <hr />
    <dl class="dl-horizontal">
        <dt>
            @Html.DisplayNameFor(model => model.FirstName)
        </dt>

        <dd>
            @Html.DisplayFor(model => model.FirstName)
        </dd>

        <dt>
            @Html.DisplayNameFor(model => model.LastName)
        </dt>

        <dd>
            @Html.DisplayFor(model => model.LastName)
        </dd>

        <dt>
            @Html.DisplayNameFor(model => model.Email)
        </dt>

        <dd>
            @Html.DisplayFor(model => model.Email)
        </dd>

    </dl>

    @using (Html.BeginForm()) {
        @Html.AntiForgeryToken()

        <div class="form-actions no-color">
            <input type="submit" value="Delete" class="btn btn-default" /> |
            @Html.ActionLink("Back to List", "Index")
        </div>
    }
</div>
Let's run your application and you will see all the customers.
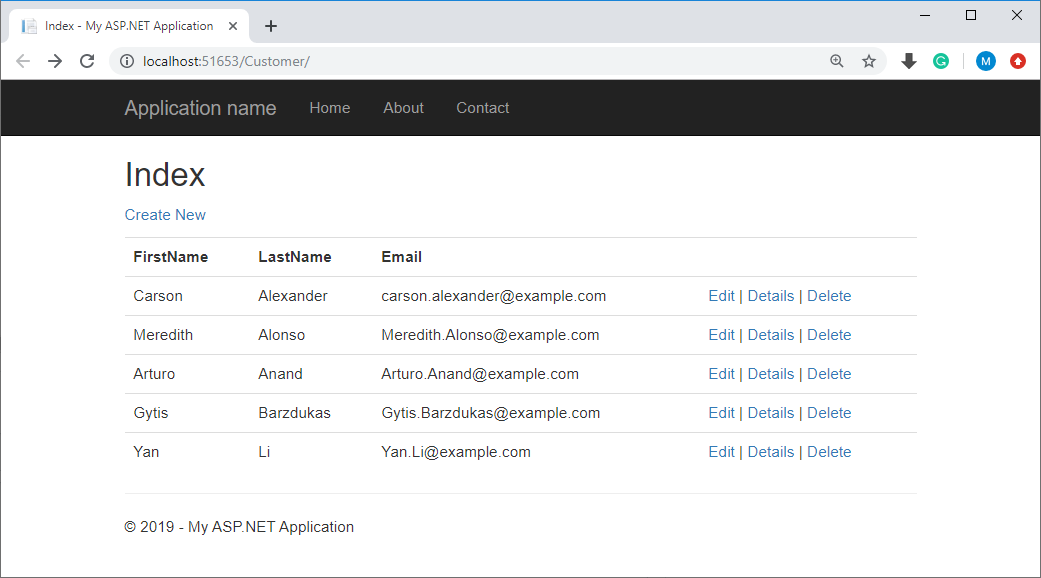
Now click on Create link and you will see a Create page.
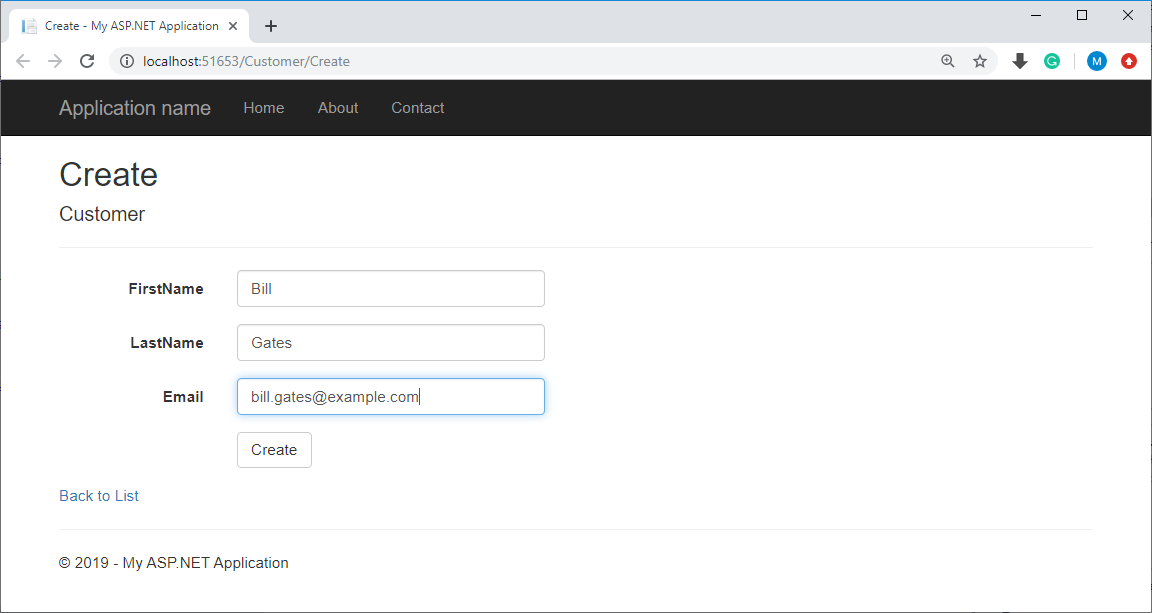
Enter data in all the fields and press Create button, you will the index view.
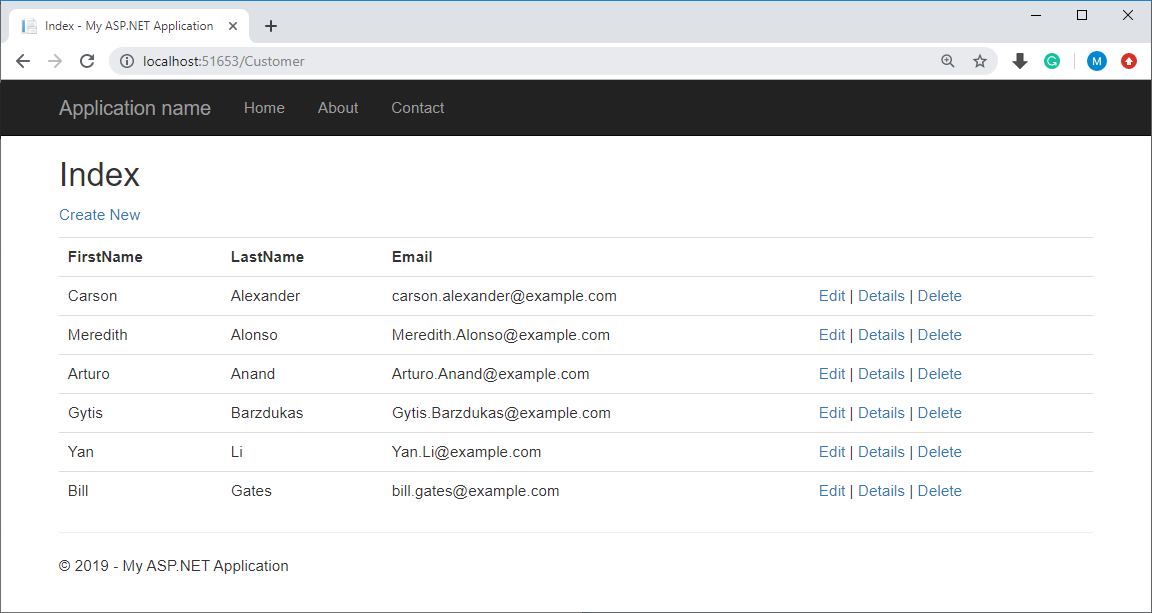
Similarly, you can try the Edit link as well to update any customer data.
Related Articles
ZZZ Projects